Are you experiencing challenges as your projects become more complex with Claude Code? To solve these challenges, I developed dotclaude-template.
The Challenge: Limitations of AI in Complex Projects
Claude Code is a powerful tool capable of handling diverse tasks in a single conversation. However, complex projects face these challenges.
Context Bloat
As projects grow larger, trying to hold all knowledge at once blurs focus. "Can do anything" paradoxically makes "what to do" unclear.
Quality Variance
Areas requiring specialization—optimization problem formulation, test design, debugging strategies—tend to receive generic responses instead of expert-level guidance.
Context Loss Between Sessions
When you interrupt and resume work, recalling the previous state and incomplete tasks takes time.
What is dotclaude-template?
A .claude/ directory template for Claude Code projects. Through agent separation and command definitions, it enables consistent development experience even in complex projects.
.claude/
├── agents/           # Specialized agent definitions
│   ├── project-manager.md
│   ├── implementer.md
│   ├── test-runner.md
│   └── debugger.md
└── commands/         # Custom command definitions
    ├── session-start.md
    └── session-end.md
Design Philosophy: Responsibility Separation with Specialized Agents
Core 4 Agents
- project-manager: Planning, task breakdown, delegation to other agents
- implementer: Code implementation, refactoring
- test-runner: Test execution, result analysis, coverage management
- debugger: Root cause analysis, hypothesis verification, fix proposals
Collaboration Patterns
By documenting inter-agent collaboration, we achieve consistent quality.

For example, the new feature implementation flow:
- project-manager analyzes requirements and creates implementation plan
- Delegates implementation to implementer
- After completion, test-runner executes tests
- On failure, debugger analyzes root cause
- project-manager reports to user
Workflow Standardization with Commands
session-start / session-end
Session management commands enable context persistence.

/session-start: Generate session ID, restore previous session state, verify environment information, identify incomplete tasks
/session-end: Record work content, clarify incomplete tasks, organize next actions
This allows smooth resumption even after interrupting work.
Context Persistence with Serena Memory (Recommended)
For session context persistence, we strongly recommend using the Memory feature of Serena.
Why use Serena Memory?
- Survives conversation resets: Unlike file-based storage, reliably persists via MCP server
- Structured data: Saves session ID, incomplete tasks, and next actions in organized format
- Seamless restoration:
/session-startautomatically restores previous state
# Example content saved to Serena Memory

## Last Session
- Session ID: 20260125_143052
- End Time: 2026-01-25 17:30:00

## Incomplete Tasks
- [ ] Implement feature A
- [ ] Add tests

## Next Actions
1. Complete feature A implementation
2. Address code review feedback
When Serena is available, the setup process automatically configures Serena Memory usage.
Adding Domain-Specific Agents
Beyond the core 4 agents, you can add project-specific specialists.
Example: Web Application
agents/
├── project-manager.md
├── frontend-specialist.md       # React/Vue implementation
├── backend-specialist.md        # API implementation
├── database-specialist.md       # Schema design
├── test-runner.md
└── debugger.md
Example: Optimization Project
agents/
├── project-manager.md
├── python-specialist.md
├── test-runner.md
├── debugger.md
├── optimization-specialist.md   # Problem formulation
├── data-validator.md            # Input data validation
└── result-analyzer.md           # Result analysis & visualization
Usage
Method 1: Automatic Setup with Claude Code
Simply instruct Claude Code:
Read this repository and set up a .claude/ environment for my project
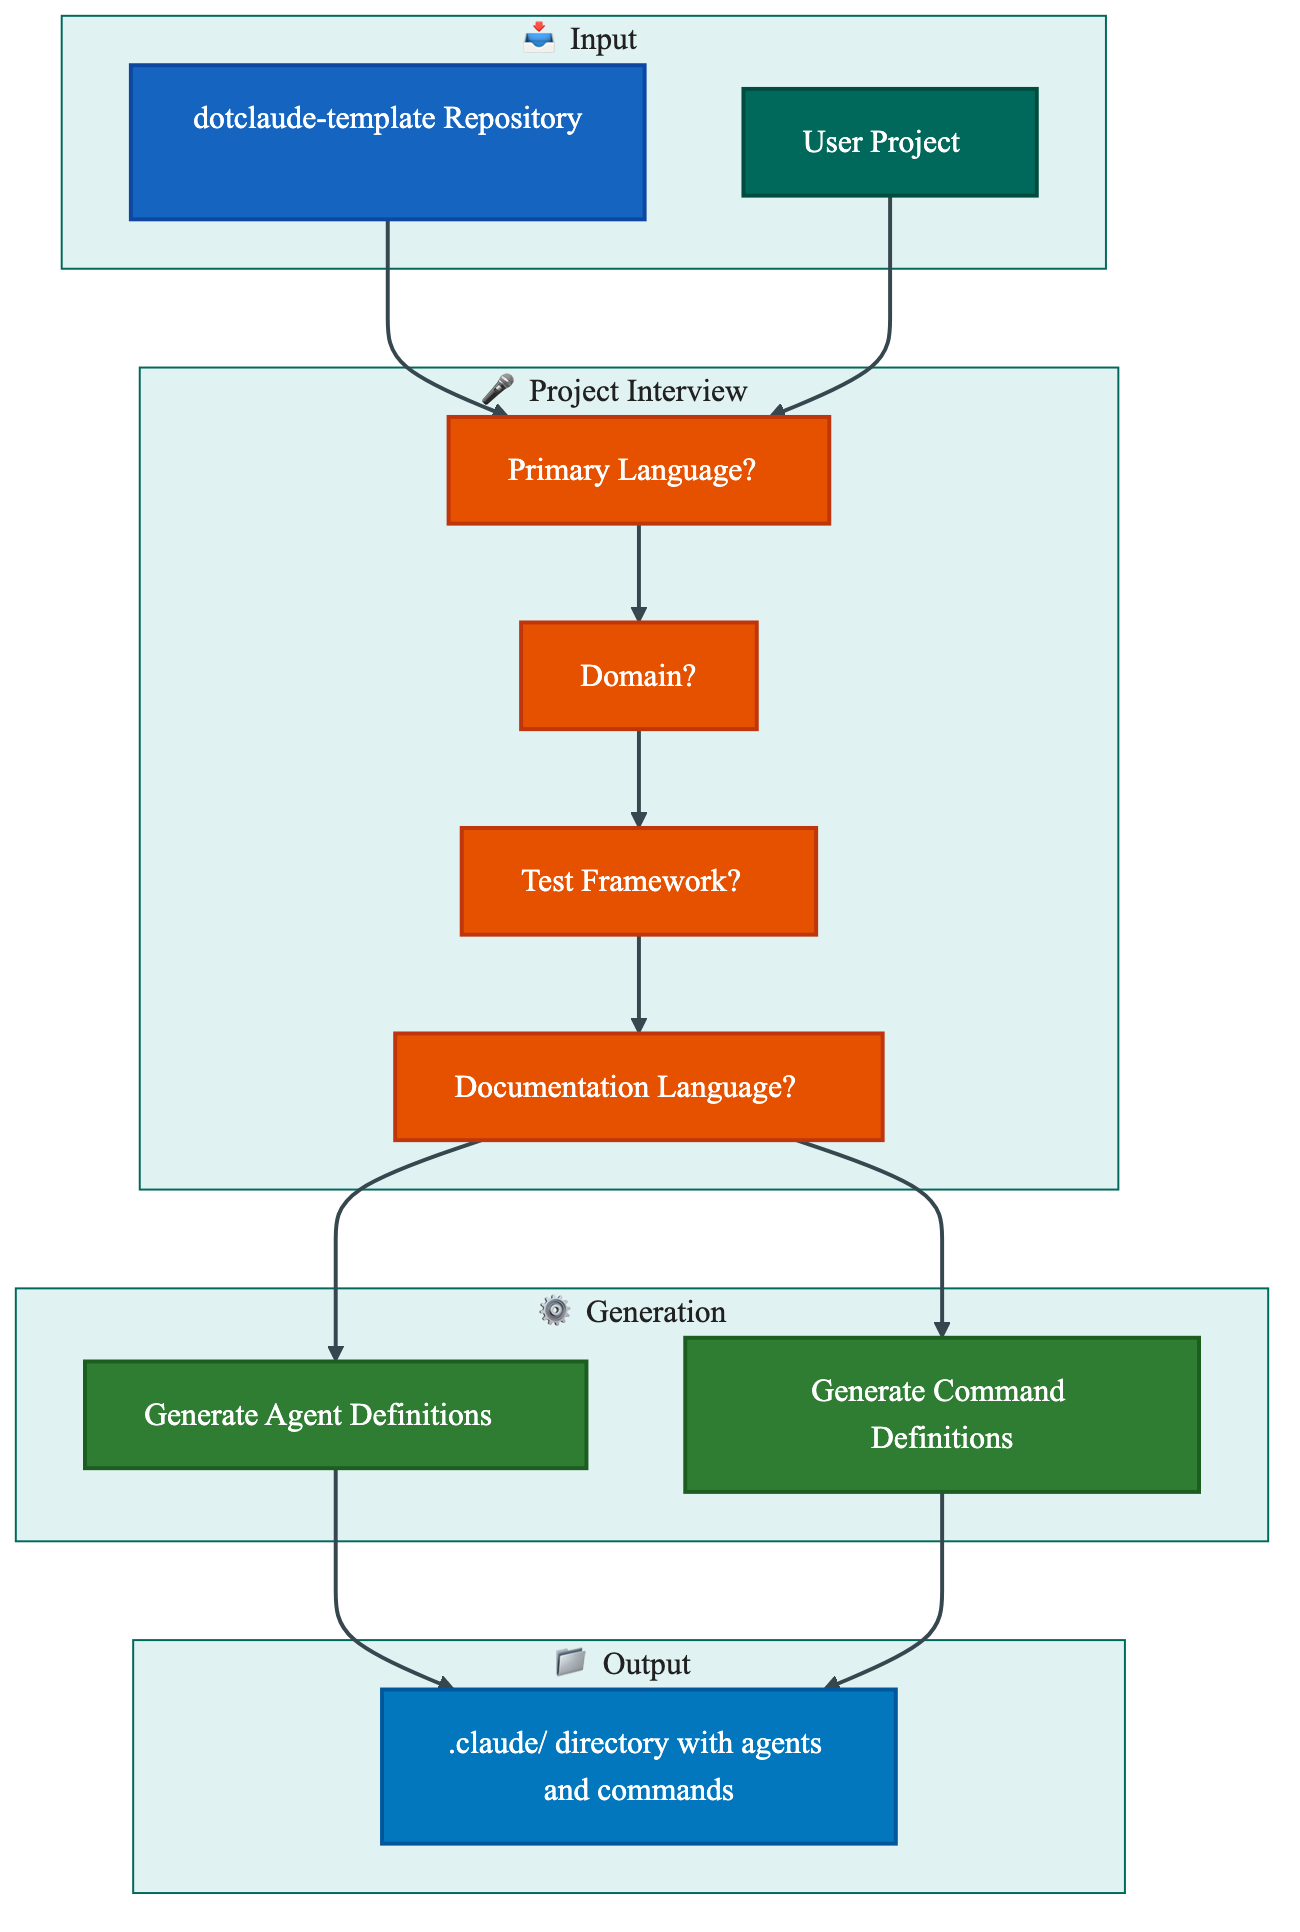
https://github.com/manabelab/dotclaude-templateClaude Code will interview you about your project characteristics and generate appropriate agents and commands.
Interview Items:
- Primary language (Python / TypeScript / Go, etc.)
- Domain (Web / Data Analysis / Optimization, etc.)
- Test framework
- Package manager
- Serena MCP server availability
- Documentation language (English / Japanese / Chinese / Korean)
Method 2: Manual Copy
- Copy contents of
templates/directory to.claude/ - Customize according to your project
Multi-Language Support
By selecting a language during setup, you can generate agent and command definitions in your preferred language:
- English
- 日本語 (Japanese)
- 中文 (Chinese)
- 한국어 (Korean)
Conclusion
dotclaude-template is a template for structuring and streamlining development with Claude Code. Through agent separation and command definitions, it provides consistent development experience even in complex projects.
Documentation:
Please give it a try. Feedback and contributions are welcome.
コメント
コメントを投稿