Many researchers and developers use Obsidian for project management. I'm one of them. I wanted to store instructions and tasks in Obsidian and have AI execute them—this idea led to the development of claude-obsidian-task.
The Challenge: Complexity of Task Instructions to AI
Claude Code is a powerful AI coding assistant, but there are challenges when requesting complex tasks.
Context Fragmentation
Project background, past research results, related documents—copying and pasting these every time is inefficient. All information is organized in Obsidian, yet manual transcription was required to communicate it to the AI.
Scattered Work Records
Where to save the results of AI conversations? Chat history flows away and becomes hard to reference later. Returning work results to Obsidian also required manual effort.
Features of claude-obsidian-task
This tool seamlessly connects Obsidian and Claude Code.
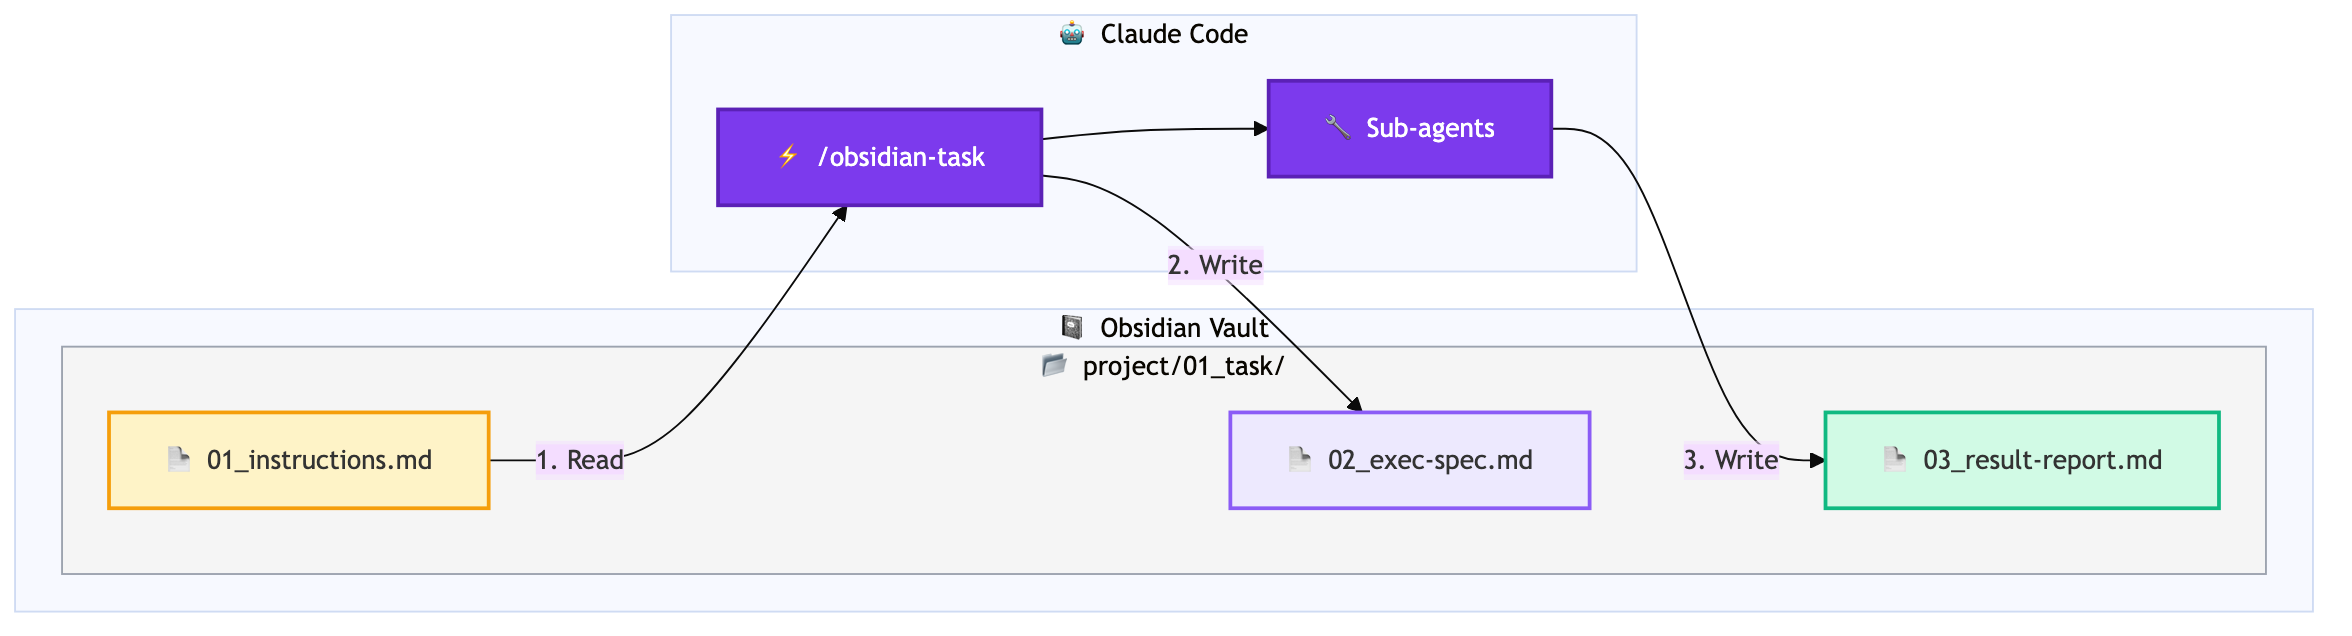
Direct Reading from Obsidian Vault
/obsidian-task project/01With this single command, instruction files within Obsidian Vault are automatically found and loaded. It searches using fuzzy matching, so entering project/01 will find the project/01_task-name directory.
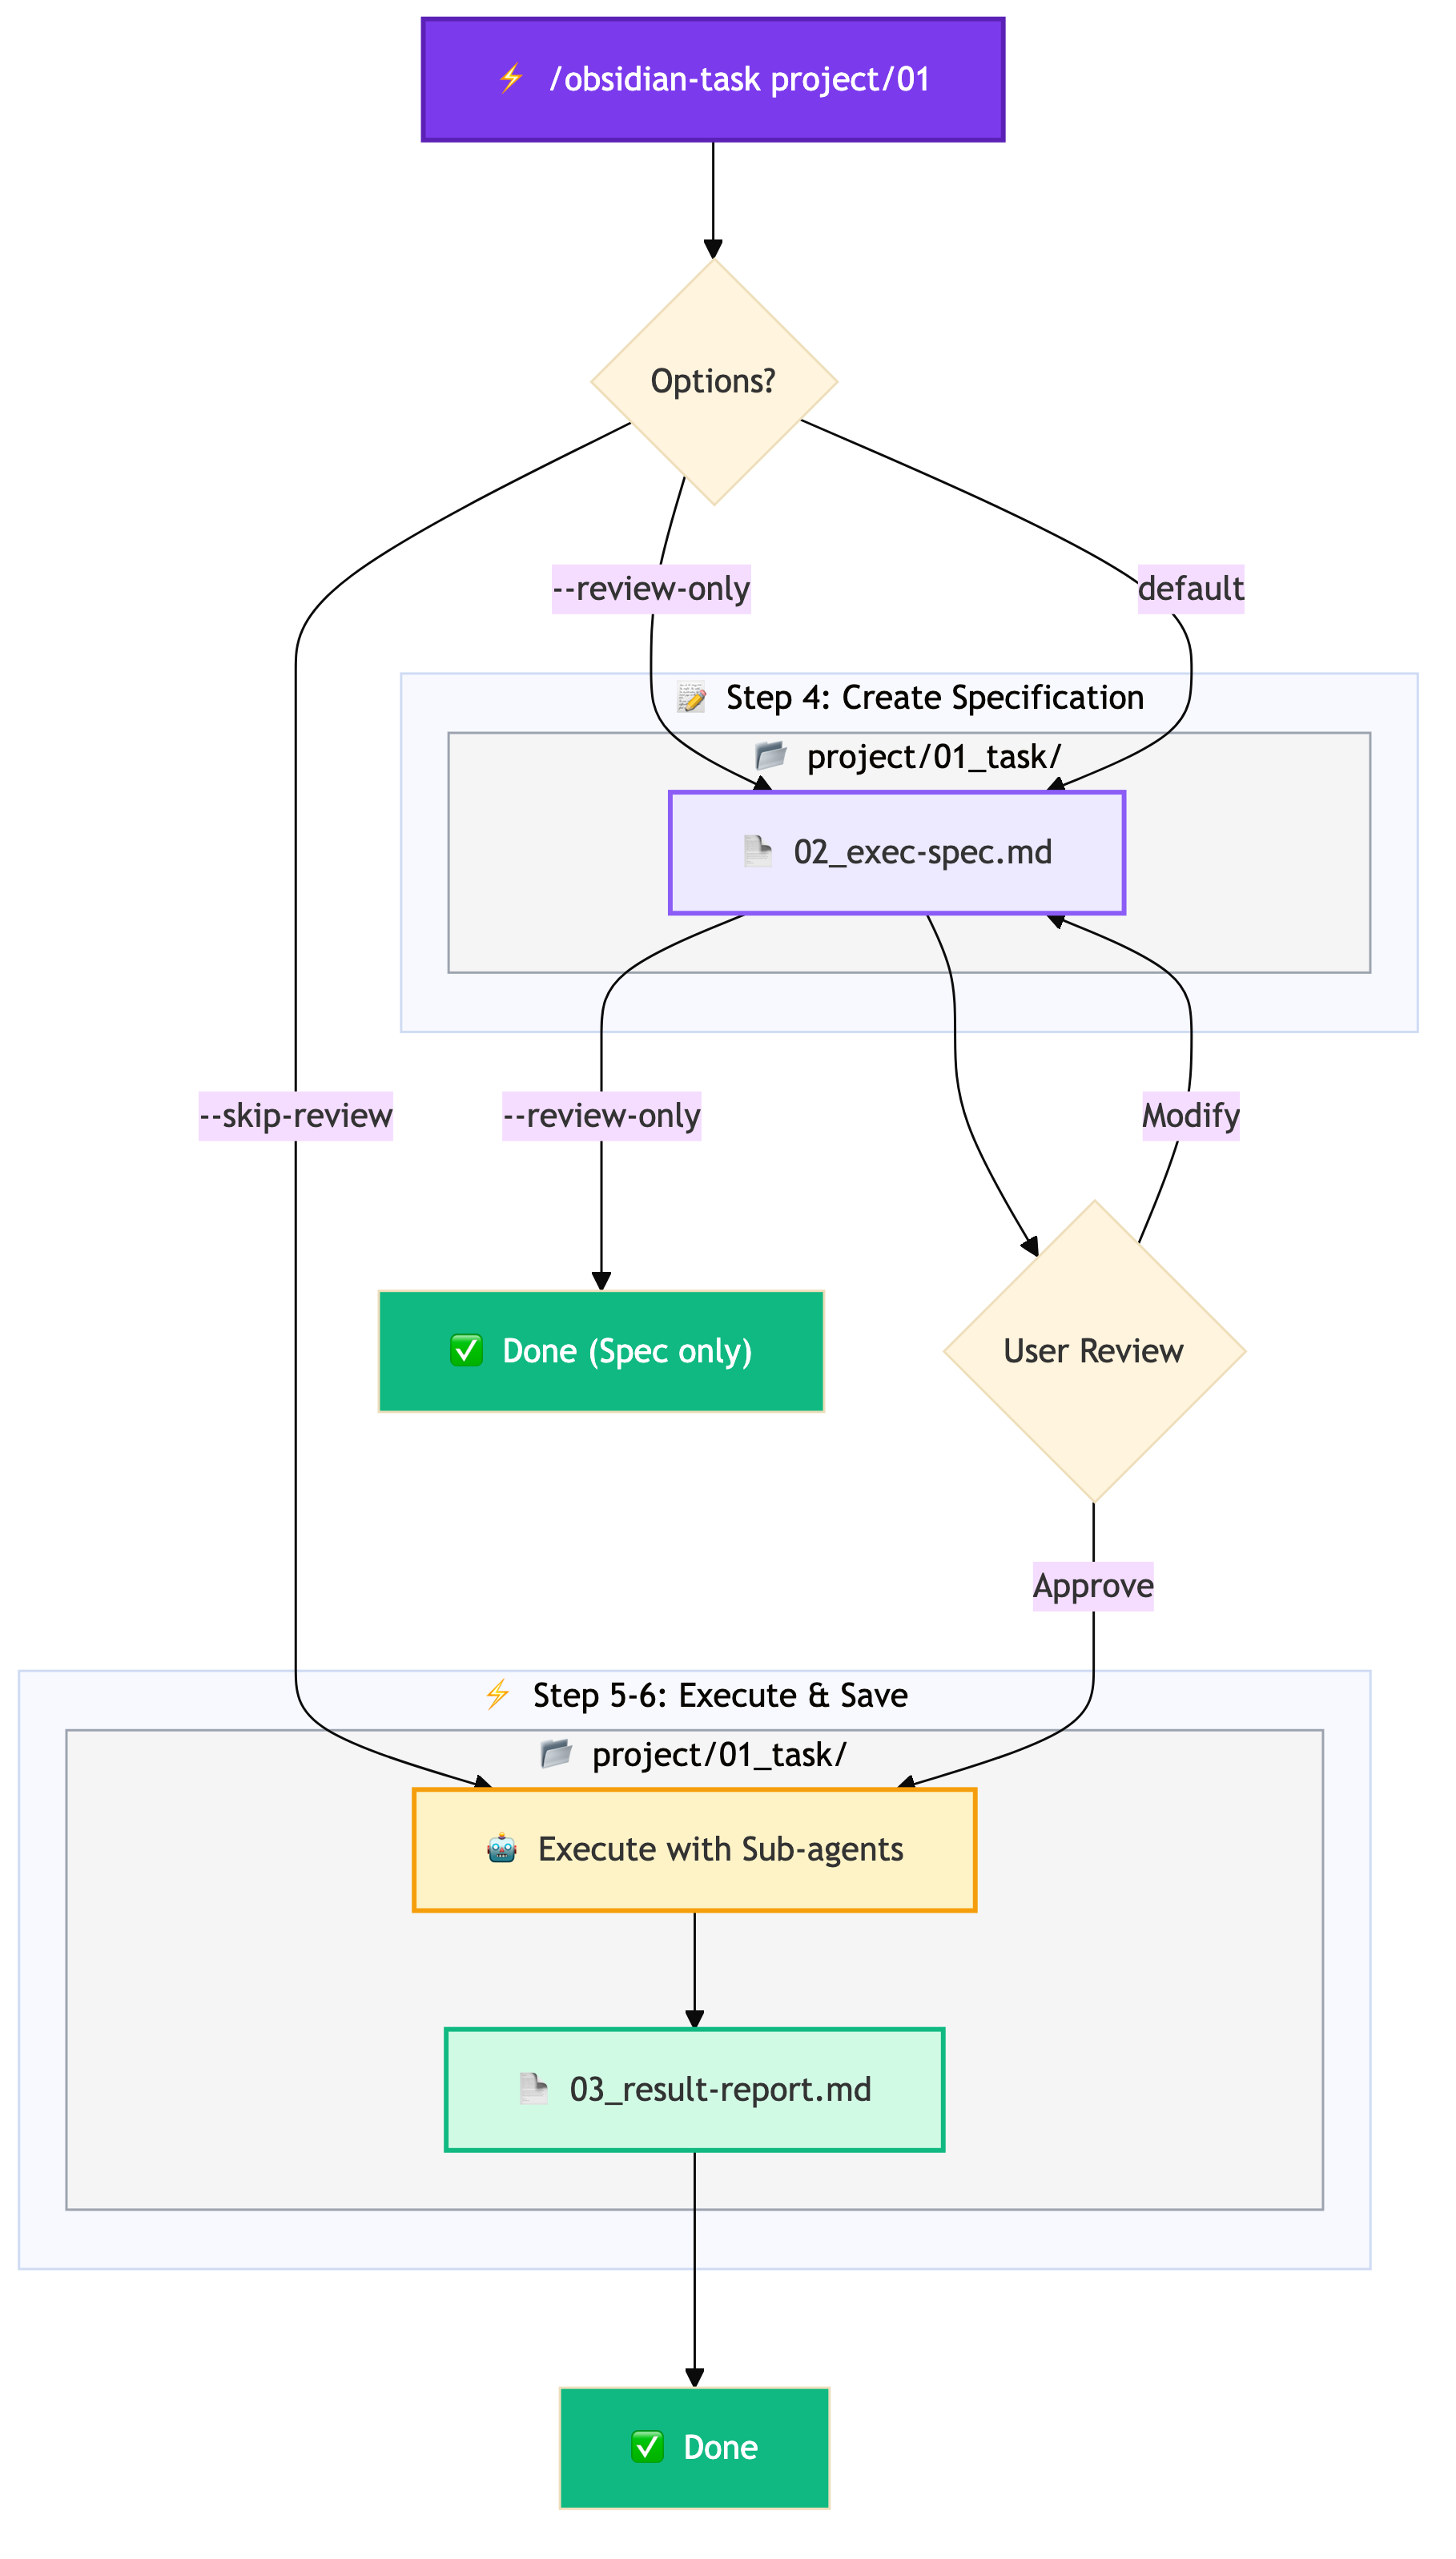
Review-Enabled Workflow
By default, an "execution specification" is created before task execution, requesting user approval.
/obsidian-task project/01              # Execute after review
/obsidian-task project/01 --skip-review # Skip review
/obsidian-task project/01 --review-only # Create spec only
This prevents the AI from going in unintended directions and allows you to verify the plan in advance.
Automatic Result Saving
After task completion, results are automatically saved to the same directory.
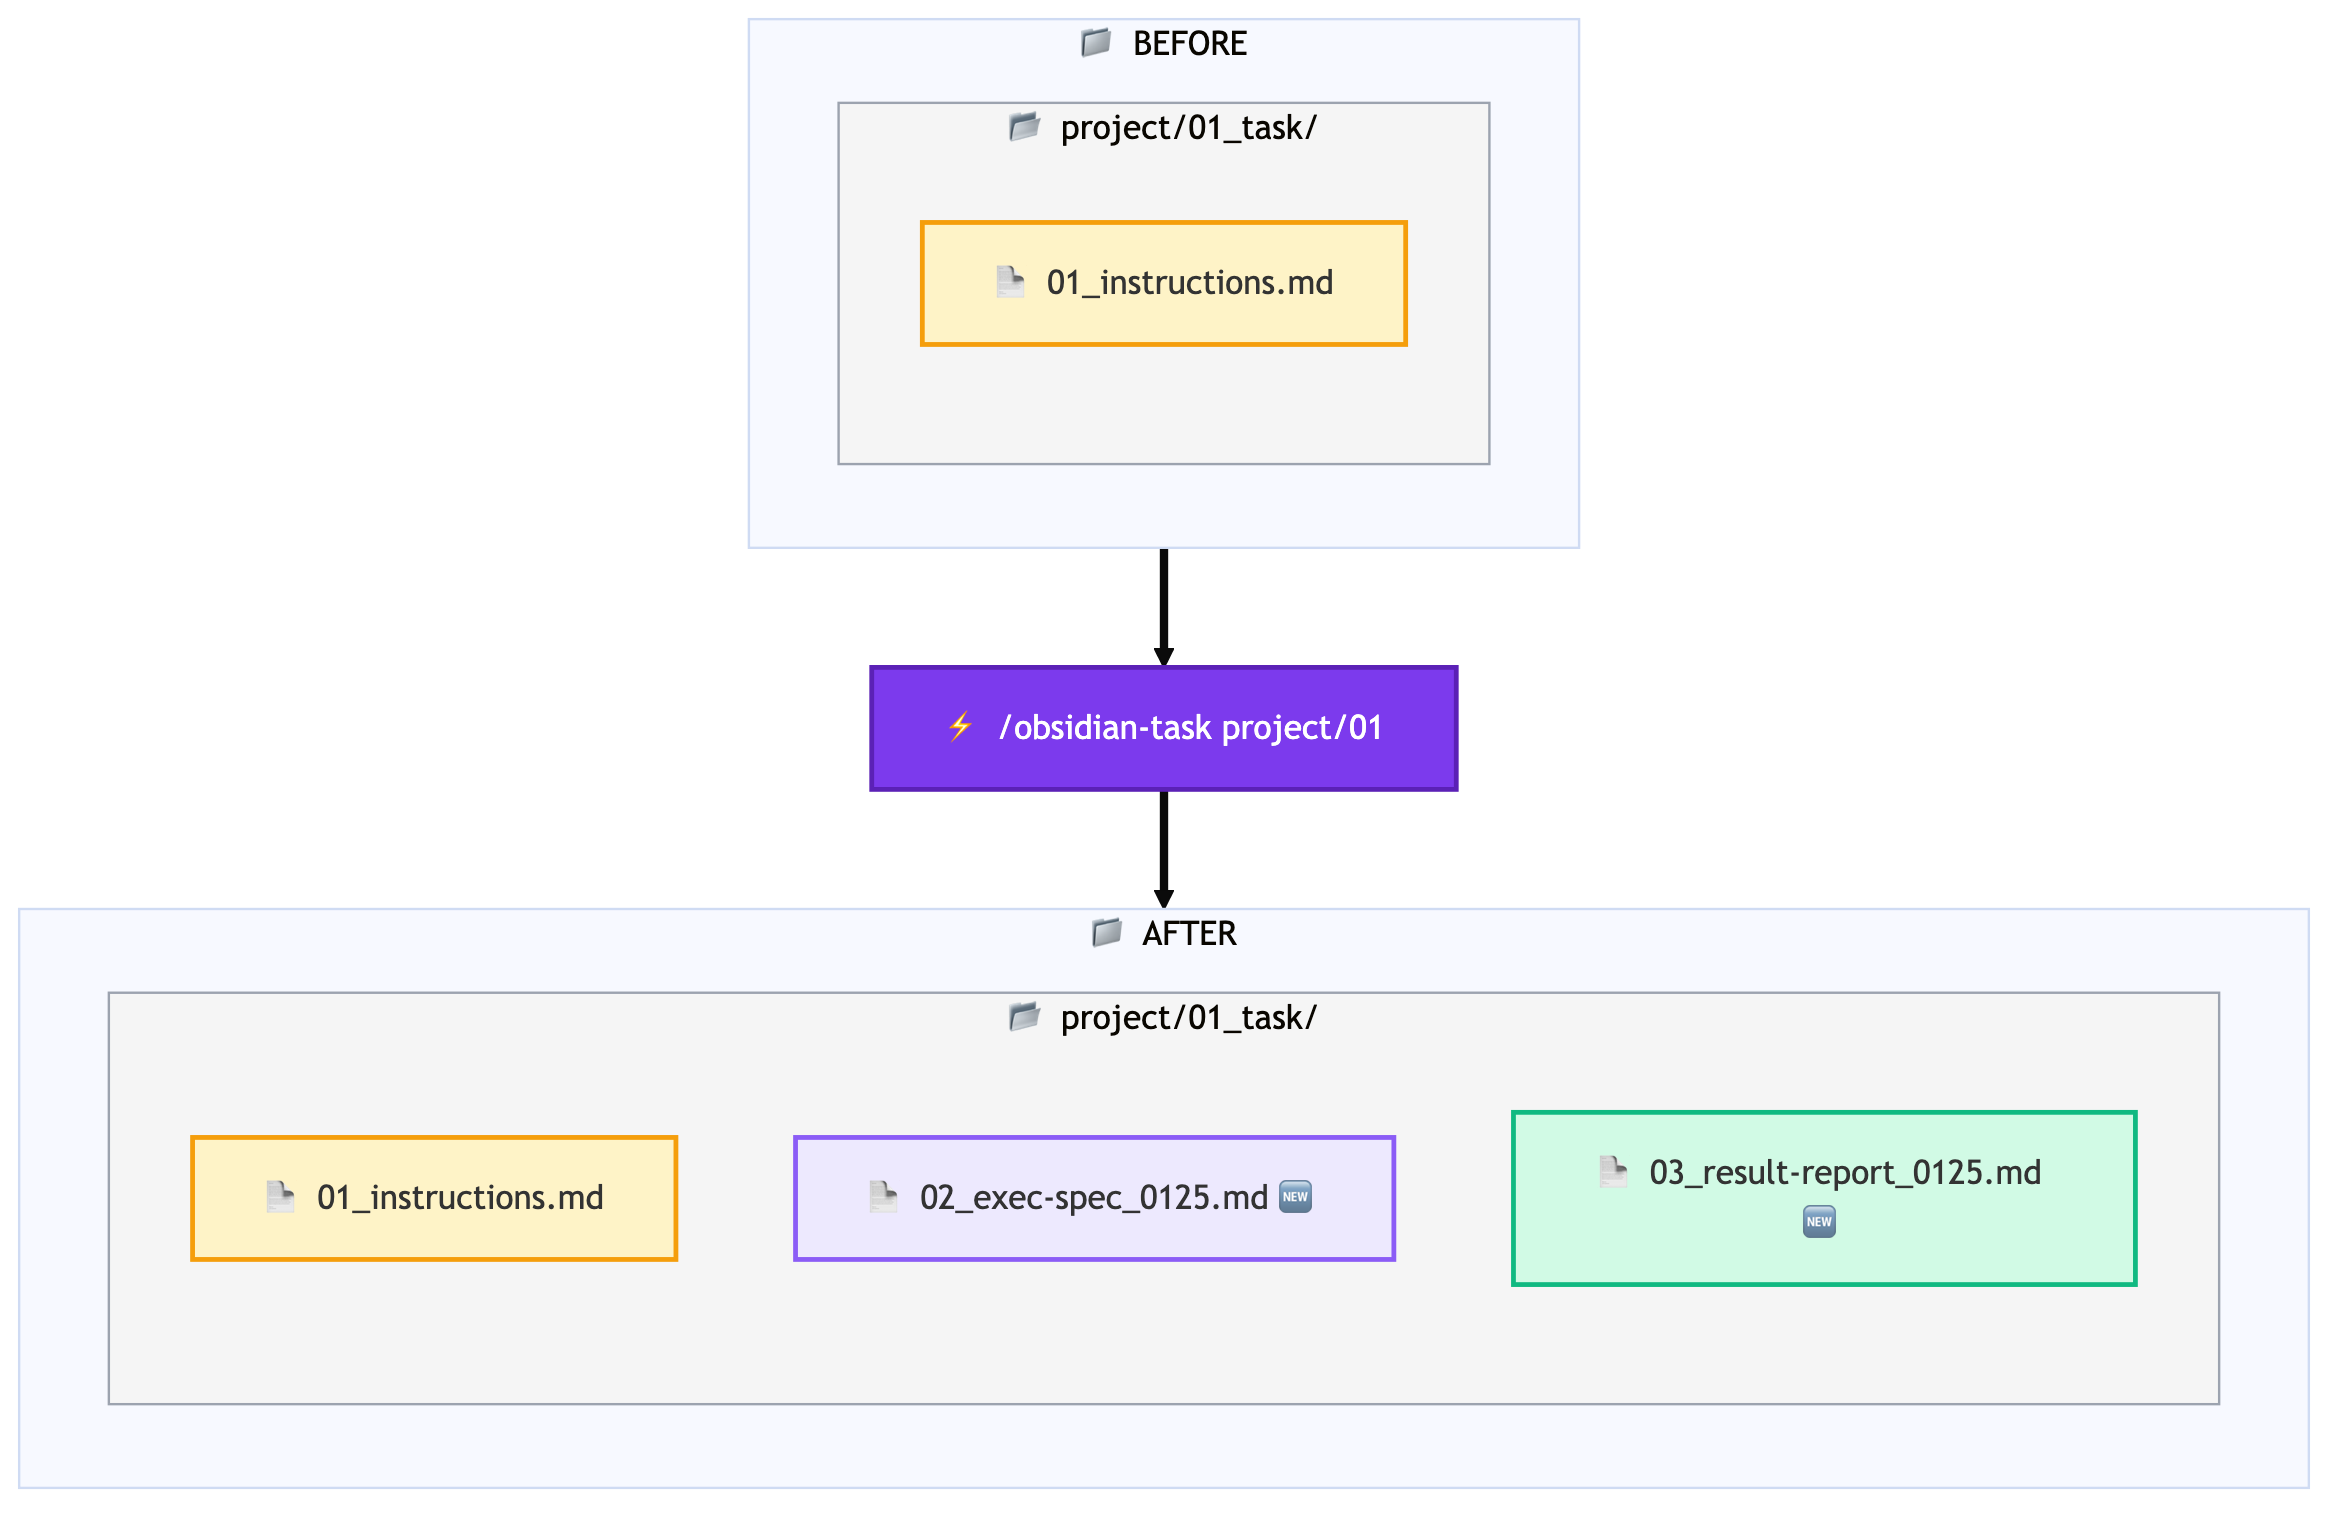
All records remain within Obsidian, making later reference and search easy.
Sub-agent Integration
If sub-agents are defined in the project's CLAUDE.md, they are automatically utilized.
project-manager: Planningarchitecture-specialist: Design taskspython-specialist: Python implementationtest-runner: Test execution
Workflow Overview
The following diagram shows the flow from command execution to completion.
Installation
git clone https://github.com/manabelab/claude-obsidian-task.git
cd claude-obsidian-task
./setup.sh
The setup script will ask for your Obsidian Vault path and automatically configure settings.
Usage Example
For example, suppose you have a new feature implementation task.
- Create
project/feature-auth/01_instructions.mdin Obsidian - Write the instruction content (requirements, constraints, links to references, etc.)
- Run
/obsidian-task project/feature-authin Claude Code - Review and approve the execution specification
- After task completion, the result report is automatically saved
This workflow integrates task management with AI utilization, improving work transparency and reproducibility.
Conclusion
claude-obsidian-task is a tool for Obsidian users to more effectively utilize Claude Code. It provides a consistent workflow from reading instructions to saving results.
Please give it a try. Feedback and contributions are welcome.
コメント
コメントを投稿